
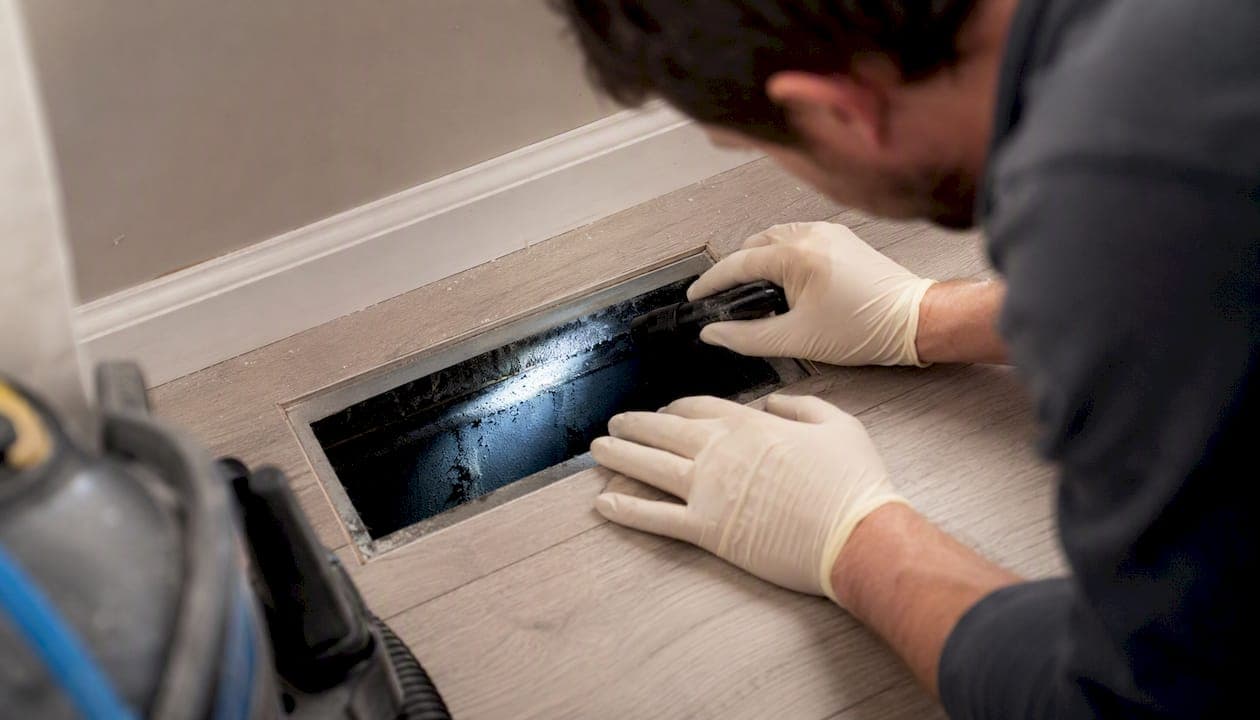
Most renovations do contaminate ductwork enough to warrant cleaning, but the EPA recommends inspecting first rather than booking automatically. The rule is simple: if visible dust film coats your registers, filters clog within a few weeks of the renovation finishing, or your furnace cabinet shows drywall residue, schedule a professional clean. If none of those signs appear, a filter swap and a visual check may be all you need.
Three signs that cleaning is likely necessary:
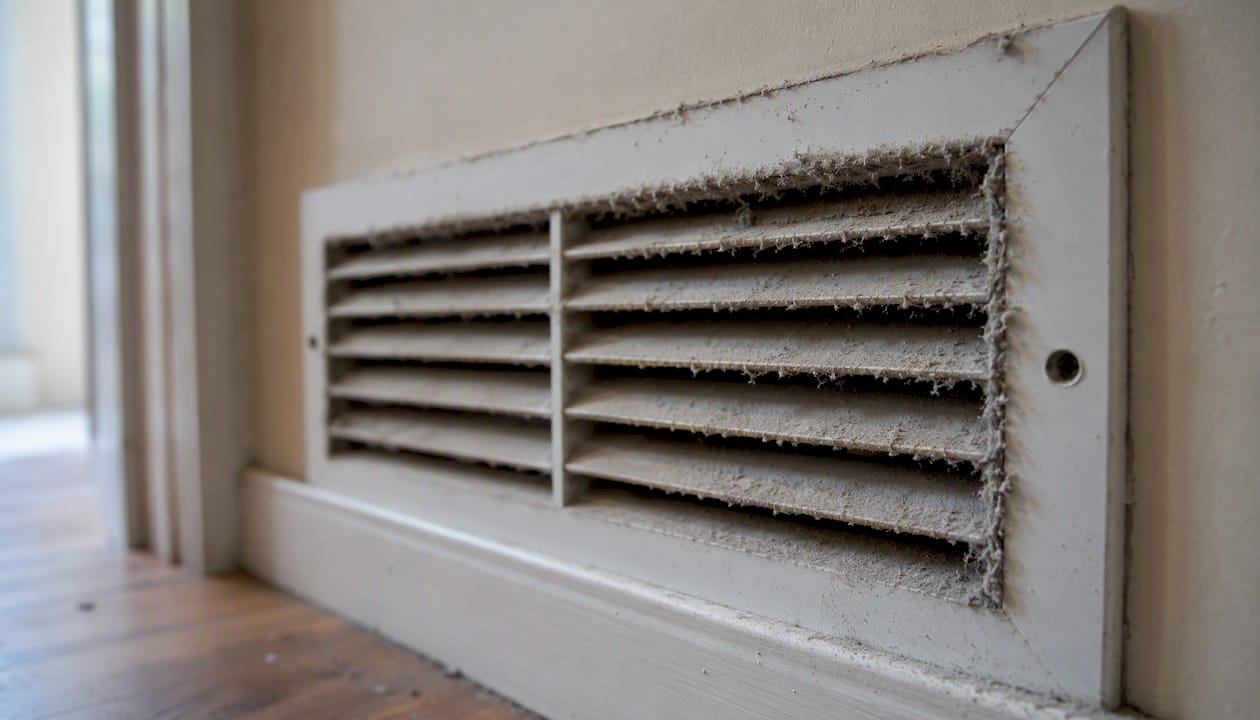
- A grey or white film visible inside supply and return registers after the trades leave
- Filters loading up with fine white dust within a few weeks of work finishing
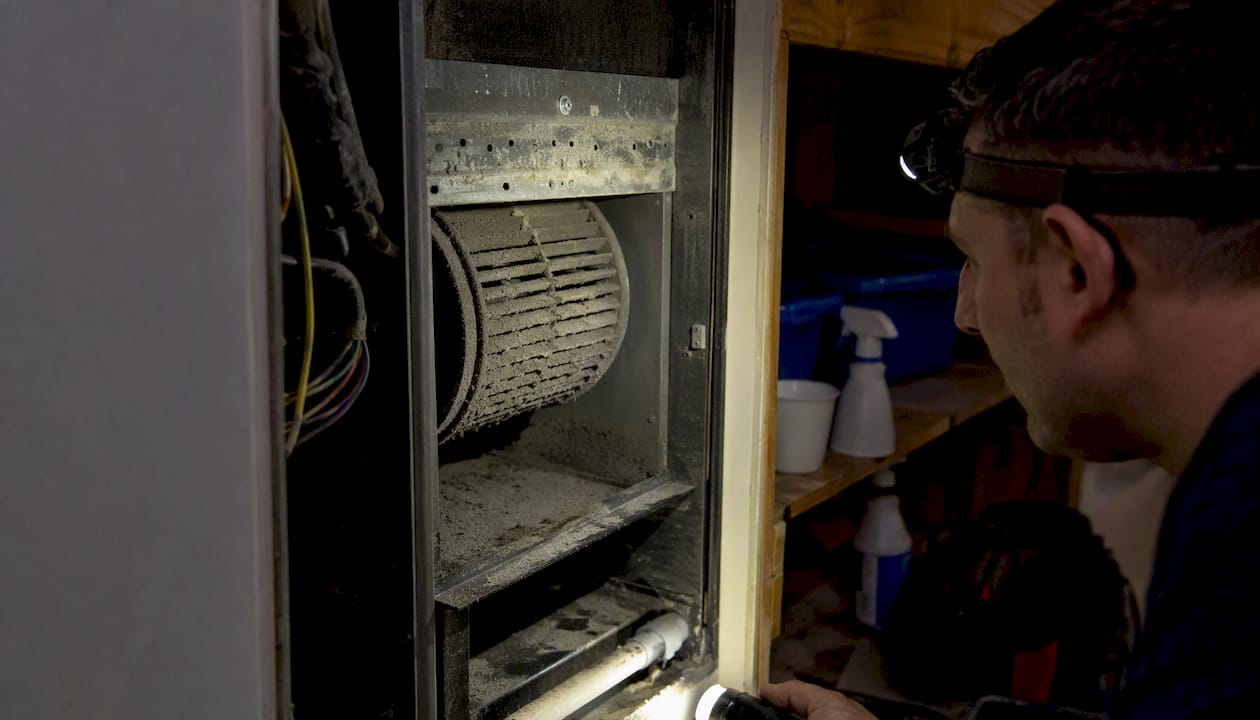
- Visible contamination on the blower wheel, evaporator coil, or inside the air handler cabinet
Bodies like the EPA, ACCA, NADCA, and local specialists such as Clean Vents all converge on the same starting point: inspect before you commit.
Key takeaways
Post-renovation duct cleaning is necessary when visible contamination is present, but an inspection always comes before a booking.
| Point | Details |
|---|---|
| Inspect before booking | Check registers and return boots visually before committing to a cleaning service. |
| Wait for all dusty trades | Schedule cleaning only after every dusty phase is complete, not between phases. |
| Air handler is non-optional | Any professional scope must include the blower, coil, and drain pan, not ducts alone. |
| Prevention saves money | Sealing registers and covering the air handler during work reduces or eliminates cleaning costs. |
| Clean Vents for post-renovation work | INCV-certified technicians, flat-rate quotes, and before-and-after photo documentation for every job. |
Table of Contents
- When should you schedule post-renovation duct cleaning?
- What are the real benefits of cleaning ducts after a renovation?
- How professionals clean ducts after renovation (step by step)
- How to prevent duct contamination while renovating
- When is DIY cleaning acceptable, and when does it stop?
- How to choose a post-renovation duct-cleaning professional
- How Clean Vents handles post-renovation duct cleaning
- The inspection-first rule is the only advice that actually holds up
- Post-renovation inspection and quote with Clean Vents
- Sources
- FAQ
When should you schedule post-renovation duct cleaning?
Timing matters more than most homeowners realise. Cleaning between renovation phases, say after drywall but before painting, is almost always money wasted. Later trades will recontaminate the system, and you end up paying twice.
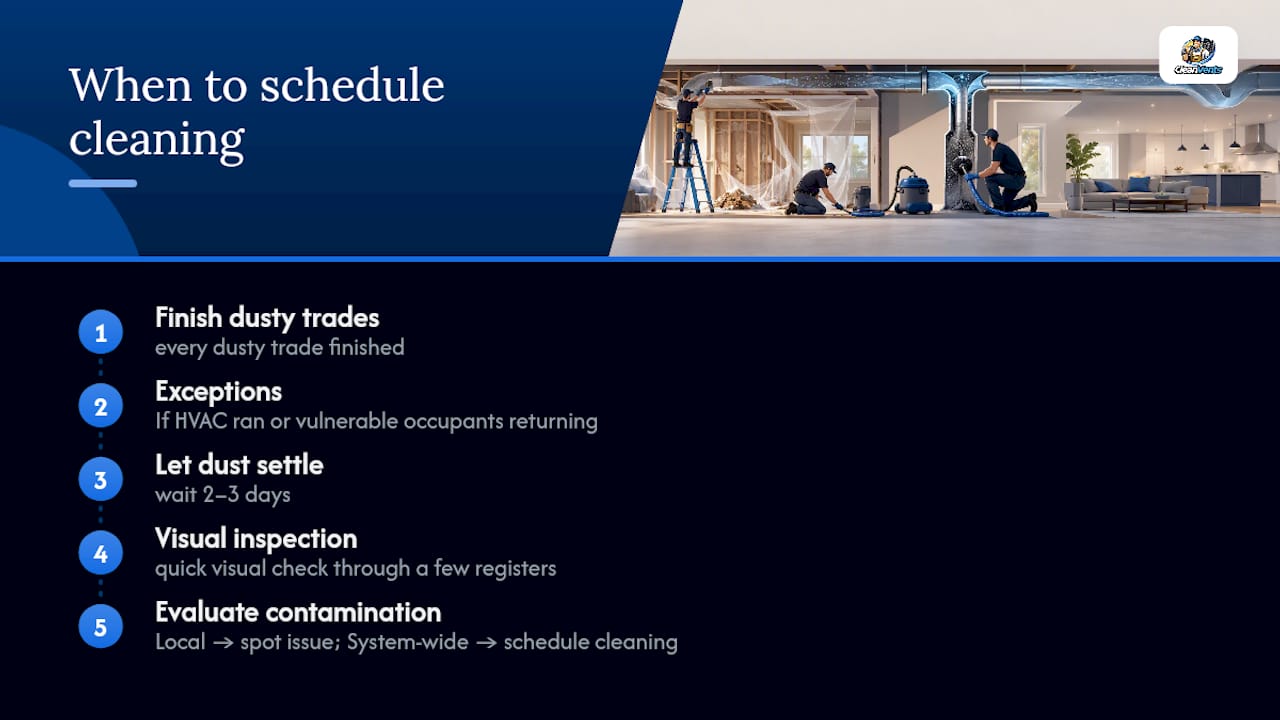
The cost-effective pattern is to wait until every dusty trade, drywall, sanding, tile cutting, spray texture, is completely finished. Let the dust settle for two to three days, then do a visual inspection of several registers before calling anyone.
Some situations do justify moving faster. If the HVAC ran continuously during sanding or demolition, contamination reaches deeper into the system and the urgency increases. The same applies when occupants with asthma, allergies, or compromised immunity are returning to the home. Respirable dust can affect lung health, and the risk is higher for vulnerable people than for a healthy adult in a well-ventilated space.
A quick visual ductwork inspection through a few registers costs nothing and tells you whether contamination is local—near the register boots—or has travelled deeper into the system.
What are the real benefits of cleaning ducts after a renovation?
The clearest benefit is indoor air quality. Drywall dust is unusually fine, often finer than standard filter media can capture on the first pass. Once it settles inside return trunks and branch runs, every time the system cycles it recirculates that dust through the living space. Occupants notice it as a persistent grey film on surfaces, or as irritation that does not resolve even after thorough cleaning.
Equipment protection is the second reason to take this seriously. Dust build-up on a blower wheel changes its balance and increases motor load. On an evaporator coil, even a thin layer of fine particulate acts as insulation and reduces heat-transfer efficiency. Air duct debris can restrict airflow enough to measurably raise operating costs over time.
The comfort argument is more practical than it sounds. Homeowners who skip post-renovation cleaning often spend months dusting surfaces that keep reloading. A single thorough clean of the duct system, combined with a fresh high-MERV filter, typically breaks that cycle.
How professionals clean ducts after renovation (step by step)
Professional post-renovation duct cleaning follows a specific sequence. Skipping steps, particularly air handler servicing, is where lower-quality providers cut corners.
Typical workflow:
- Inspection and documentation — camera or visual check of registers, return trunks, and air handler before any work begins; photos recorded.
- System isolation — registers and returns sealed off in sequence to maintain negative pressure throughout the run.
- Negative-pressure vacuuming — a high-volume particulate collector (typically above 800 cfm per PNNL guidance) is connected to the main trunk to pull debris toward the collection point.
- Pneumatic or cable brushing — soft-bristle tools dislodge compacted dust from duct walls and drive it toward the vacuum; flexible ducts require gentler technique to avoid liner damage.
- HEPA collection — all dislodged material is captured before it can re-enter the living space.
- Air handler and coil service — blower wheel, evaporator coil, and drain pan cleaned at the same session; skipping this step leaves the biggest contamination source untouched.
- Filter replacement — a fresh pleated filter installed after cleaning so the system does not immediately reload.
- Post-cleaning documentation — photos and a written scope confirming which components were serviced.
Equipment that matters:
- Negative-pressure vacuum with high-volume capacity
- Pneumatic or rotary brush system sized for the duct diameter
- HEPA-rated collection unit to prevent recontamination
- Camera or inspection scope for before-and-after documentation
PNNL guidance is explicit: avoid wet solvents or UV treatments as substitutes for physical removal. They do not dislodge particulate and can leave residue or create conditions for microbial growth.
How to prevent duct contamination while renovating
Prevention is cheaper than cleaning. A few straightforward steps during the renovation can significantly reduce how much dust reaches the duct system in the first place.
Primary steps:
- Seal every supply and return register with plastic sheeting and tape before dusty work begins.
- Cover the air handler unit completely, including the return plenum.
- Keep duct openings closed whenever trades are cutting, sanding, or spraying.
- Avoid running the HVAC during any phase that generates fine particulate.
When the HVAC must run for occupant comfort, switch to a high-efficiency pleated filter and check it every few days. A filter that loads in a week is a sign that dust is entering the system faster than the filter can handle. Local air scrubbers placed in the work zone can intercept a significant portion of airborne particulate before it migrates.
Pro Tip: Include a written indoor air quality protection clause in your renovation contract. Specify that the contractor is responsible for sealing registers and covering the air handler before any dusty work begins. This shifts accountability and reduces the chance of a dispute about who pays for post-renovation cleaning.
Some renovation approaches are designed to minimise dust migration from the start. Low-dust door replacement processes are one example of how trades can stage work to reduce airborne particulate. Asking your contractor about dust-minimising workflows before the project starts is worth the conversation.
When is DIY cleaning acceptable, and when does it stop?
There are a few things you can safely do yourself after a renovation. Replacing the filter with a MERV 11 or MERV 13 pleated filter is always a good first step. Wiping visible dust off grilles and register covers takes five minutes. Shining a flashlight into a register boot to check for visible debris is exactly the kind of low-cost inspection that tells you whether to call a professional.
That is roughly where DIY stops being useful.
Household vacuums lack the suction and containment to reach blower wheels or coil surfaces. Trying to vacuum inside a register boot with a shop vac often dislodges dust and pushes it further into the system rather than removing it. Drywall dust is fine enough to bypass the collection bag of most consumer vacuums and re-enter the room air.
Call a professional when you see:
- Visible grey or white dust inside register boots beyond the first few centimetres
- Dust puffs from vents when the system first starts after the renovation
- Any sign of contamination on the blower wheel or inside the furnace cabinet
- Filters loading completely within two weeks of a fresh installation
Opening the furnace cabinet yourself to inspect or clean the blower is not recommended without HVAC training. Damage to the blower wheel or coil fins is expensive to repair and easy to cause with the wrong tools.
How to choose a post-renovation duct-cleaning professional
Not every duct cleaning company has experience with construction contamination. The debris profile after a renovation, fine drywall particulate, joint compound residue, insulation fibres, is different from routine household dust, and it requires specific equipment and technique.
| What to look for | What to avoid |
|---|---|
| INCV or NADCA certification | No stated credentials or affiliations |
| Camera inspection before and after | Verbal-only scope, no documentation |
| Negative-pressure vacuum equipment | Portable shop-vac style equipment only |
| Air handler and coil included in scope | Duct-only quote that excludes air handler |
| Written scope listing every component | Vague "full system" promise with no detail |
| Proof of liability insurance | No insurance documentation available |
Questions worth asking on the quote:
- Which components are included: supply trunks, return trunks, air handler, evaporator coil, drain pan?
- What vacuum capacity does your equipment run?
- How do you prevent recontamination of cleaned sections while working?
- Will you provide before-and-after photos?
Red flags include promises to treat or cure health conditions, proposals to fog or spray the ducts instead of physically cleaning them, and any quote that does not mention the air handler. Price alone is a poor guide. A quote that excludes the air handler may look cheaper but leaves the most contaminated component untouched.
Job size, number of accessible registers, duct material (rigid sheet metal versus flexible), and whether air handler servicing is included are the main factors that move a quote up or down. Flexible duct systems take more care and time. Clean Vents' guide for Canadian homeowners covers what to expect from a complete service scope.
How Clean Vents handles post-renovation duct cleaning
Clean Vents follows an inspection-first workflow on every post-renovation job. Before any equipment is connected, a technician documents the condition of registers, return boots, and the air handler with photos. That baseline matters: it confirms whether cleaning is warranted and gives the homeowner a clear record of what was found.
The cleaning itself uses negative-pressure vacuuming combined with pneumatic brushing, with the air handler, blower wheel, and evaporator coil serviced in the same visit. Filters are replaced at the end of the job.
Clean Vents' trust assets for post-renovation work:
- INCV-certified technicians trained in construction-contamination scenarios
- Before-and-after photo documentation provided to the homeowner
- Written scope listing every component cleaned, delivered with the quote
- Upfront flat-rate pricing with no surprise add-ons after the job
Before-and-after results from Clean Vents jobs show the difference between a contaminated blower wheel and a clean one. Requesting that kind of documentation before you book is a reasonable standard to hold any provider to.
The inspection-first rule is the only advice that actually holds up
Most of the conventional advice on post-renovation duct cleaning errs in one of two directions: either it tells every homeowner to book immediately after any renovation, or it dismisses cleaning as unnecessary unless the system is visibly black. Neither is right.
The inspection-first principle cuts through both extremes. A five-minute look inside a few registers tells you more than any general rule. If the dust is there, clean it properly, air handler included, with documented results. If it is not, change the filter and monitor.
What gets underestimated is the air handler. Homeowners focus on the ducts because they are visible. The blower wheel and evaporator coil are not, and they are where fine drywall dust does the most lasting damage. Any cleaning scope that does not include them is incomplete, regardless of how thorough the duct work looks.
The other thing worth saying plainly: prevention during the renovation is worth more than any cleaning after it. Sealed registers and a covered air handler cost a contractor fifteen minutes. Undoing the contamination they prevent can cost several hundred dollars and a half-day of professional work.
Post-renovation inspection and quote with Clean Vents
Renovation finished and not sure what your ducts look like inside? Clean Vents offers a visual register inspection, camera documentation option, and a written flat-rate quote before any work begins. You see exactly what was found, exactly what will be cleaned, and exactly what it costs.
The inspection covers register condition, return boot contamination, and a check of the air handler cabinet. If cleaning is warranted, the written scope lists every component, supply trunks, return trunks, blower, coil, and drain pan, so there are no surprises on the invoice.
Book your post-renovation inspection with Clean Vents and get a flat-rate quote the same day.
Sources
The sources below back the recommendations in this article and are worth reading directly if you want the policy or technical detail behind the guidance.
- Should You Have the Air Ducts in Your Home Cleaned? | US EPA
- Removing construction debris from ducts | Building America Solution Center (PNNL)
- Dust and the lungs | CCOHS
FAQ
Does every renovation require duct cleaning?
No. The EPA recommends cleaning only when ducts are visibly contaminated or when construction dust entered the system. A visual inspection of registers and the air handler is the right first step.
Does cleaning air ducts really make a difference after a renovation?
Yes, when contamination is present. Removing fine drywall dust from ducts, the blower wheel, and the evaporator coil stops that material from recirculating through the home and reduces the load on filters and mechanical components.
What is the two-foot rule for ducts?
It is an informal observation that debris from construction tends to accumulate near register boots and the first section of branch runs. Checking inside a register boot with a flashlight to look for visible debris often reveals whether contamination is local or has spread further into the system.
When is the best time of year to schedule duct cleaning after a renovation?
Timing relative to the renovation matters more than the season. Wait until all dusty trades are finished and dust has settled for two to three days, then inspect and book. Avoid scheduling between renovation phases.
How do I verify that a duct cleaning company is qualified for post-renovation work?
Ask for INCV or NADCA certification, confirm the scope includes the air handler and coil, and request before-and-after photos from recent post-renovation jobs. Clean Vents provides all three as standard.