

You might not realize it, but hidden leaks in your ductwork could be silently draining your wallet and compromising your family's health. Undetected duct leaks can increase your energy bills by up to 20%, while invisible mold and dust accumulate inside the system you trust to deliver clean air. This guide walks you through a practical, step by step inspection process that protects both your indoor air quality and your budget.
Table of Contents
- Preparation And Prerequisites Before Ductwork Inspection
- Step By Step Visual And Physical Inspection Techniques
- Signs Of Contamination, Damage, And Leaks To Watch For
- When And How To Clean Or Repair Ductwork Post Inspection
- Safety Considerations And Protective Gear For Diy Inspection
- Common Mistakes During Inspection And How To Avoid Them
- Expected Outcomes And Success Metrics Of Proper Ductwork Inspection
- Professional Air Duct And Dryer Vent Cleaning Services In Laval
- Frequently Asked Questions
Key Takeaways
| Point | Details |
|---|---|
| Essential Preparation | Gather flashlight, screwdriver, N95 mask, and gloves before starting your inspection to ensure safety and thoroughness. |
| Systematic Inspection Steps | Remove vent covers, use flashlight to check for dust and mold, inspect joints for leaks, and document all findings carefully. |
| Common Warning Signs | Look for mold spots, excessive dust buildup, disconnected ducts, and air leaks that signal contamination or damage. |
| Health and Energy Benefits | Proper inspection and sealing reduce airborne dust by up to 50% and can save 15 to 20% on heating and cooling costs. |
| Know Your Limits | Call professionals immediately if you suspect asbestos in older homes or encounter complex repairs beyond DIY capabilities. |
Preparation and Prerequisites Before Ductwork Inspection
Before you dive into inspecting your ducts, assembling the right tools and safety equipment prevents costly mistakes and protects your health. You will need a high powered flashlight to illuminate dark duct interiors, a screwdriver set for removing vent covers, an N95 mask to filter airborne particles, and nitrile gloves to protect your hands from sharp edges and contaminants. A smoke pencil or incense stick helps detect air leaks, while a notebook or smartphone camera documents problem areas for future reference.
Understanding your home's age is crucial for safety. Older homes may contain asbestos in ductwork; disturbing this requires professional handling. If your house was built before the 1980s, never attempt to remove or disturb duct materials without professional assessment. Asbestos fibers, when released into the air, pose severe long term health risks that far outweigh any DIY savings.
Prepare your work area by laying down drop cloths to catch falling dust and debris. Turn off your HVAC system at the thermostat to prevent dust circulation during inspection. Open windows in the work area to maintain ventilation, and inform household members about the inspection to keep children and pets away from the workspace. Having everything organized before you begin ensures a smooth, efficient inspection process.
Here is a quick reference table for your inspection toolkit:
| Tool/Equipment | Primary Purpose | Safety Note |
|---|---|---|
| High powered flashlight | Illuminate duct interiors | Choose LED for cooler operation |
| Screwdriver set | Remove vent covers | Use magnetic tip to prevent dropped screws |
| N95 mask | Filter airborne particles | Replace after each inspection session |
| Nitrile gloves | Hand protection | Change if torn or heavily soiled |
| Smoke pencil | Detect air leaks | Use in well ventilated areas only |
| Camera/notebook | Document findings | Date all photos and notes |
Pro Tip: Schedule your inspection on a dry, mild weather day when you can open windows for ventilation without extreme temperature loss. This creates ideal conditions for detecting air leaks and minimizes dust exposure.
With your tools ready and safety measures in place, you are prepared to begin the actual inspection process. The Clean Vents Home Page offers additional resources if you need professional guidance during your preparation phase.
Step by Step Visual and Physical Inspection Techniques
A systematic approach ensures you catch problems that could cost you hundreds in wasted energy and health issues. Follow these steps in order to conduct a thorough inspection that rivals professional assessments.
-
Start by carefully removing vent covers and registers using your screwdriver. Place screws in a small container so they do not get lost. Inspect each cover for dust buildup, which indicates poor filtration or excessive system contamination.
-
Shine your flashlight into each duct opening, examining as far as the beam reaches. Look for visible dust accumulation, cobwebs, debris, or discoloration on duct walls. Black, green, or white spots indicate potential mold growth that requires immediate attention.
-
Inspect all visible duct joints and seams for gaps, disconnections, or obvious damage. Run your hand along connections while the system is off, feeling for temperature differences or air movement that suggest leaks. Pay special attention to areas where ducts change direction or connect to the main trunk line.
-
Light your smoke pencil or incense stick and hold it near duct seams and joints while a helper briefly turns on the HVAC fan. Watch for smoke being sucked into gaps (indicating leaks) or blown away (indicating disconnections). This simple test reveals problems invisible to the naked eye.
During your inspection, watch for these specific mold indicators:
- Black or dark green spots on duct surfaces
- White fuzzy growth on insulation materials
- Musty odors emanating from vents
- Visible moisture or water stains near duct connections
- Rust or corrosion on metal ductwork
Document everything you find with photos and detailed notes, including the location, severity, and type of each issue. This record becomes invaluable when deciding whether to tackle repairs yourself or call professionals, and it helps track changes over time during future inspections.
Pro Tip: Work in a consistent pattern, such as clockwise around each floor, to ensure you do not skip any vents. Mark completed vents with painter's tape as you go to maintain your place if interrupted.
Research shows that 40% of DIY duct inspections miss key problem areas without thorough step by step inspection. Following this methodical approach dramatically improves your detection rate. For more detailed guidance, check out this duct inspection guide, and do not forget that dryer vent inspection tips apply similar principles for another critical home system.
Signs of Contamination, Damage, and Leaks to Watch For
Recognizing specific warning signs during your inspection helps you prioritize problems and take appropriate action. Contamination appears as visible mold growth, excessive dust layers, or discoloration on duct surfaces. You might also notice a musty smell when the system runs, indicating biological growth inside the ductwork that spreads spores throughout your home.
Physical damage takes several forms. Crushed or dented ducts restrict airflow and force your HVAC system to work harder, increasing energy consumption. Disconnected sections allow conditioned air to escape into attics, crawl spaces, or wall cavities where it provides zero benefit. Holes or tears in flexible ductwork let unfiltered air enter the system, bypassing your filtration and introducing contaminants directly into your living spaces.
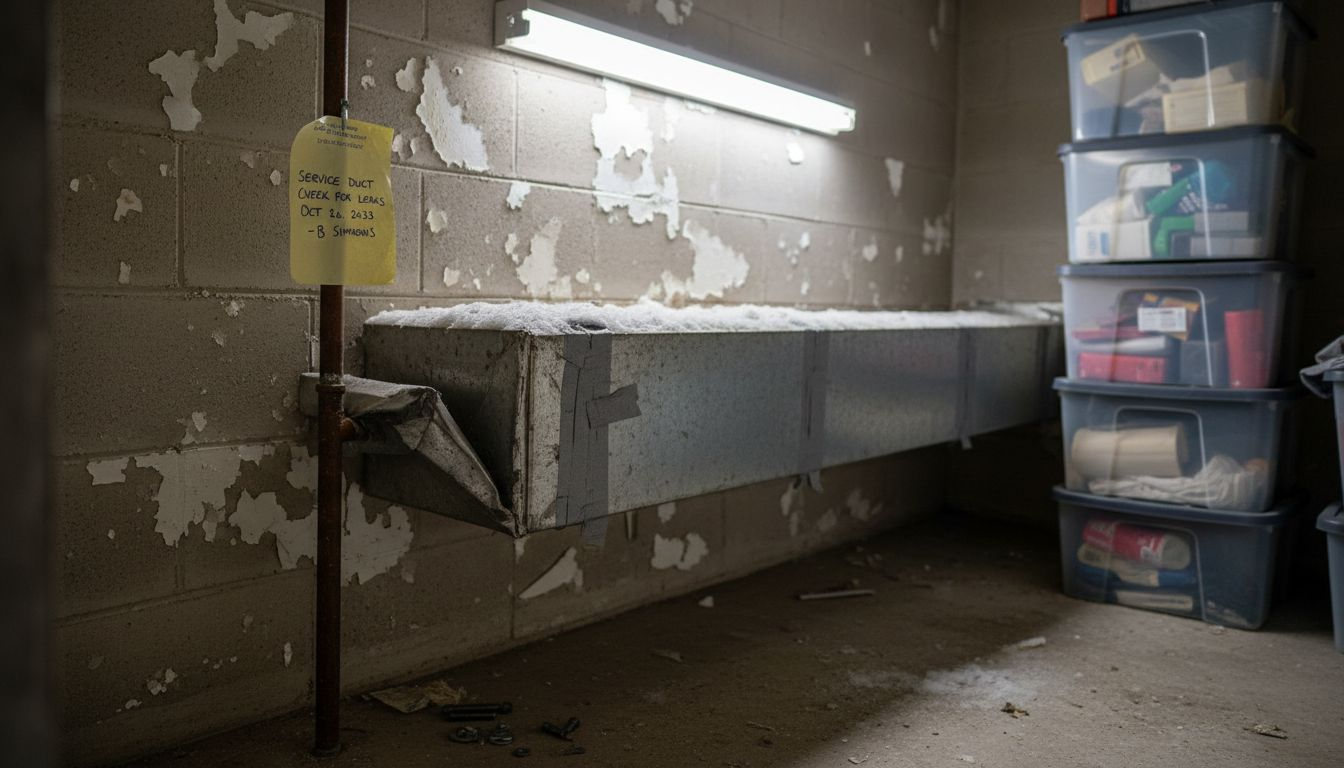
Air leaks are often the costliest problem because they waste energy continuously. During your smoke test, any movement of smoke near joints, seams, or connections indicates escaping air. You might also notice temperature differences between rooms, weak airflow from certain vents, or unusual pressure when doors close, all suggesting significant duct leakage.
This comparison table helps you understand the distinct impacts of each problem type:
| Issue Type | Common Signs | Health Impact | Energy Impact |
|---|---|---|---|
| Contamination | Mold spots, dust buildup, odors | Allergies, asthma, respiratory issues | Minimal direct impact |
| Physical Damage | Crushed ducts, disconnections, holes | Reduced air quality from bypass | 10 to 30% efficiency loss |
| Air Leaks | Draft detection, weak airflow, pressure issues | Unfiltered air introduction | 15 to 20% energy waste |
The health consequences deserve serious attention. Studies confirm that mold contamination in ducts increases asthma risk by up to 30%, making this more than just a maintenance issue. Children, elderly family members, and anyone with compromised immune systems face heightened vulnerability to these contaminants.
Each problem type requires a different response. Contamination demands cleaning, damage needs repair or replacement, and leaks require sealing. Understanding these distinctions guides your next steps and helps you communicate effectively with professionals if needed. More information about addressing duct contamination issues is available if you discover significant problems during your inspection.
When and How to Clean or Repair Ductwork Post Inspection
Your inspection findings determine whether you can handle the work yourself or need professional help. If you found light to moderate dust accumulation but no mold or structural damage, you can safely clean accessible duct sections using a vacuum with a long hose attachment and microfiber cloths. Focus on the first few feet of ductwork visible from each register, wiping down surfaces and vacuuming loose debris.
Minor air leaks at accessible joints can be sealed with mastic sealant or metal backed tape specifically designed for HVAC systems. Never use standard duct tape, despite its name, because it degrades quickly under temperature changes. Apply sealant generously around all seams and joints, ensuring complete coverage for maximum effectiveness. Research demonstrates that sealing leaks can reduce heating and cooling energy waste by 15 to 20%, making this one of the most cost effective home improvements you can tackle.
However, certain situations demand professional intervention. If you discovered any of these conditions, stop and call experts:
- Visible mold growth beyond surface dust
- Suspected asbestos materials in older homes
- Disconnected or severely damaged duct sections
- Leaks in inaccessible areas like between floors or inside walls
- Contamination throughout the entire system
Professionals possess specialized equipment like rotary brushes, negative air machines, and video inspection cameras that reach deep into duct systems. They also carry proper insurance and training for handling hazardous materials safely. The cost of professional service often proves less than the combined expense of equipment rental, your time, and potential mistakes that worsen existing problems.
Pro Tip: Photograph your completed repairs and keep a maintenance log noting what you cleaned or sealed and when. Schedule your next inspection for one year later, or sooner if you notice returning symptoms like increased dust or allergy flare ups. This documentation proves invaluable for warranty claims and helps track your system's long term health.
For comprehensive solutions, explore professional duct cleaning services that guarantee thorough contamination removal. Do not overlook dryer vent cleaning either, as lint buildup poses serious fire hazards that deserve equal attention.
Safety Considerations and Protective Gear for DIY Inspection
Protecting yourself during duct inspection is non negotiable because the contaminants you encounter can trigger immediate allergic reactions or cause long term health problems. An N95 respirator mask filters at least 95% of airborne particles, including mold spores, dust, and other allergens that become airborne during inspection and cleaning. Standard dust masks or surgical masks lack sufficient filtration for this work.
Nitrile gloves protect your hands from sharp metal edges, fiberglass insulation irritation, and direct contact with mold or bacteria. Choose gloves thick enough to prevent punctures but flexible enough to handle small screws and tools. Safety glasses prevent dust and debris from falling into your eyes when you look up into ductwork, and long sleeves protect your arms from insulation fibers and dirty duct surfaces.
Never probe ductwork with screwdrivers, wire hangers, or other sharp objects that might puncture or tear the material. These tools can create new leaks or release insulation fibers and contaminants. If you cannot see or reach an area with your flashlight, it is time to consider professional video inspection rather than forcing access.
Safety first is not just a slogan when inspecting ductwork. A single exposure to disturbed asbestos fibers or toxic mold can lead to health complications that cost thousands in medical bills and lost work time. No inspection finding is worth risking your long term health.
Asbestos danger cannot be overstated for homes built before 1980. If you suspect asbestos containing materials based on building age or visible characteristics like wrapped duct insulation, stop immediately and arrange professional testing. Disturbing asbestos releases microscopic fibers that cause incurable lung diseases decades after exposure.
Proper cleanup and hygiene complete the safety protocol. Seal all debris in plastic bags before disposing of them according to local regulations. Vacuum your work area with a HEPA filter equipped vacuum, never a standard shop vac that recirculates fine particles. Wash your hands, arms, and face thoroughly after completing the inspection, and launder work clothes separately from regular household items.
Studies confirm that N95 masks and gloves reduce exposure to airborne contaminants significantly during duct inspections. This minimal investment in protective equipment pays dividends in preventing respiratory issues and skin irritation. Additional duct inspection safety tips are available if you want to review best practices before starting your project.
Common Mistakes During Inspection and How to Avoid Them
Even well intentioned homeowners make predictable errors that compromise inspection quality and safety. The most frequent mistake is inspecting only the easily accessible vents while ignoring basement, attic, or second floor ductwork. Every vent in your home connects to the same system, and problems in one area affect air quality everywhere. Create a complete home map showing all vents, and check each one methodically.
Skipping protective gear because the job seems quick or simple exposes you to unnecessary health risks. You cannot predict when you will encounter heavy dust, mold spores, or sharp edges, so wearing an N95 mask and gloves from start to finish protects you consistently.
Using inappropriate tools damages ductwork and creates new problems. Common mistakes include:
- Forcing stuck vent covers instead of applying penetrating oil first
- Probing with screwdrivers that puncture flexible ductwork
- Using household cleaners that corrode metal ducts
- Applying standard duct tape that fails within months
- Neglecting to turn off HVAC before starting inspection
Many DIYers underestimate the complexity of concealed ductwork. Research shows 40% of DIY inspections miss concealed duct sections leading to incomplete assessments. Ducts running between floors, through walls, or above ceilings hide from casual inspection but often harbor the worst contamination and damage because they go years without attention.
If you cannot safely access certain areas, video borescopes offer an affordable solution for viewing inside walls and tight spaces. Alternatively, recognize when professional inspection makes sense. Spending a few hundred dollars on expert assessment beats missing critical problems that escalate into thousand dollar repairs or ongoing health issues.
Another common error is attempting repairs beyond your skill level. Disconnecting or modifying ductwork without understanding HVAC airflow principles can create pressure imbalances that reduce system efficiency. When in doubt, photograph the problem, document its location, and consult professionals before attempting fixes.
Pro Tip: Print a simple inspection checklist that includes every vent location, items to check at each, and space for notes. This physical guide prevents the natural tendency to rush through or skip areas when you grow tired or distracted during the inspection process.
For reliable guidance based on industry standards, review these expert duct inspection tips before starting your project. Learning from others' mistakes costs nothing and saves considerable frustration.
Expected Outcomes and Success Metrics of Proper Ductwork Inspection
Understanding realistic outcomes helps you evaluate whether your inspection and any subsequent repairs delivered expected results. A thorough home inspection typically requires 30 to 60 minutes, depending on your home's size and ductwork complexity. Rushing through in less time almost guarantees missed problems, while spending significantly longer might indicate access difficulties that warrant professional help.
After addressing discovered issues, you should notice tangible improvements within days to weeks. Indoor air quality improvements appear as reduced dust accumulation on furniture, fewer allergy symptoms among household members, and elimination of musty odors when the HVAC runs. Energy savings manifest in lower utility bills, particularly during peak heating and cooling months when your system runs most frequently.
This table summarizes typical outcomes from thorough inspection and remediation:
| Outcome Category | Measurable Result | Timeframe to Notice |
|---|---|---|
| Allergen Reduction | 40 to 50% decrease in airborne particles | 1 to 2 weeks |
| Energy Savings | 15 to 20% reduction in heating/cooling costs | Next billing cycle |
| HVAC Longevity | 3 to 5 years extended equipment life | Long term benefit |
| Indoor Air Quality | Elimination of odors and visible dust | Immediate to 1 week |
| Comfort Consistency | Balanced temperatures across all rooms | Immediate |
Early problem detection prevents exponential cost increases. A small mold patch caught early requires simple cleaning, but ignoring it for months or years can necessitate complete duct replacement costing thousands. Similarly, sealing minor leaks takes an hour and minimal materials, while extensive air loss might require professional duct sealing or even system redesign.
Data confirms that proper inspection and sealing of duct leaks can reduce airborne dust by up to 50% and save 15 to 20% on energy bills. These numbers represent real money staying in your pocket and measurably healthier air for your family. For most households, annual heating and cooling costs range from $1,000 to $2,500, so a 15% to 20% reduction means $150 to $500 in annual savings.
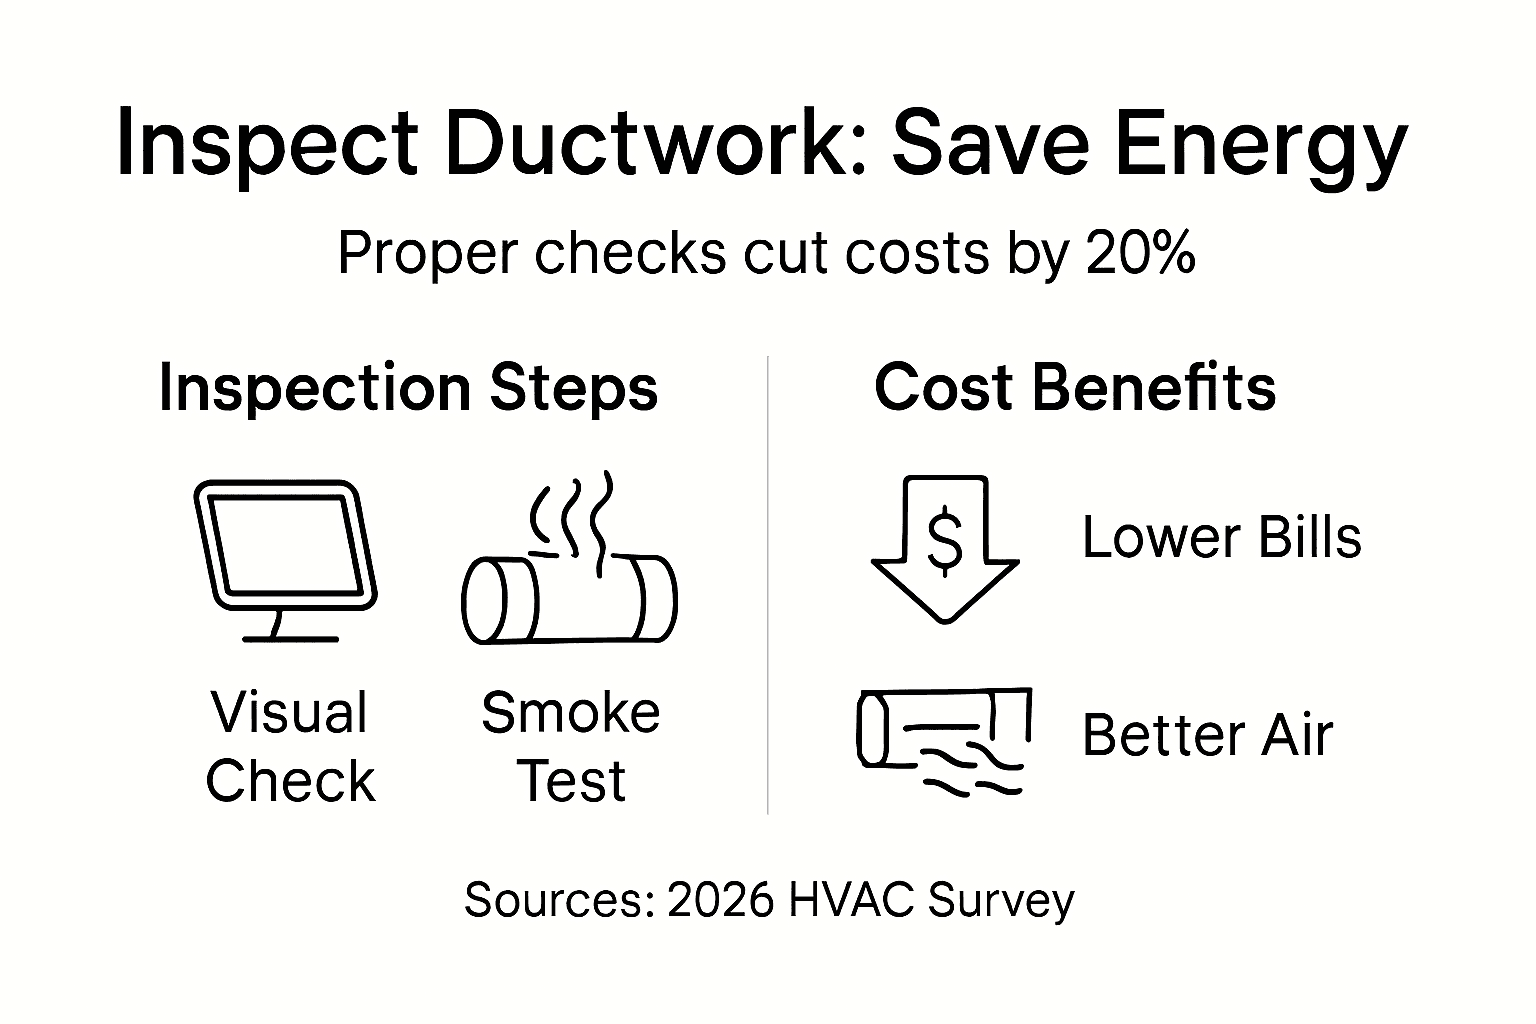
Schedule regular inspections to maintain these benefits. Annual checks catch developing problems before they escalate, and the time investment decreases with each inspection as you become familiar with your system's normal condition. Track your results in a simple log noting inspection dates, findings, actions taken, and observed improvements in air quality or energy costs.
To see documented results from professional interventions, visit information about duct cleaning results that showcase the dramatic improvements possible with thorough remediation.
Professional Air Duct and Dryer Vent Cleaning Services in Laval
While DIY inspection empowers you to catch problems early, some situations demand professional expertise and equipment. Clean Vents specializes in comprehensive air duct cleaning services in Laval that eliminate contamination beyond the reach of household tools. Our technicians use industrial grade vacuums, rotary brushes, and video inspection to clean your entire duct system thoroughly, not just the accessible portions.
We handle the challenges homeowners cannot safely address alone, including asbestos assessment, mold remediation, and repairs in concealed spaces. Our dryer vent cleaning services prevent fire hazards by removing lint buildup that causes thousands of home fires annually. Every service includes detailed documentation, before and after photos, and a satisfaction guarantee that protects your investment.
Laval homeowners trust Clean Vents because we combine transparent pricing with proven results. Our experience with local building codes and common regional issues like seasonal humidity problems ensures solutions tailored to your specific needs. Visit the Clean Vents official website to schedule your professional inspection and discover why maintaining clean ductwork is one of the smartest investments in your home's health and efficiency.
Frequently Asked Questions
How Often Should I Inspect My Ductwork?
Inspect your ductwork at least once per year, ideally before heating or cooling season begins. This timing lets you address problems before your HVAC system works hardest. Increase inspection frequency to every six months if household members experience worsening allergies, you notice declining air quality, or your energy bills rise unexpectedly despite similar usage patterns.
Can I Inspect Ductwork Myself Safely?
Yes, you can safely conduct basic duct inspections using proper protective equipment like N95 masks and nitrile gloves. Focus on accessible areas visible from vent openings and around exposed ductwork in basements or attics. However, never disturb suspected asbestos materials in homes built before 1980, and avoid using sharp tools that might damage ductwork. Call professionals immediately if you encounter extensive mold, structural damage, or materials you cannot identify confidently.
What Are the Warning Signs That My Ducts Need Cleaning or Repair?
Visible mold spots, excessive dust accumulation around vents, and persistent musty odors indicate contamination requiring professional cleaning. Physical warning signs include crushed or disconnected duct sections, holes in flexible ductwork, and gaps at seam connections. Functional symptoms like increased allergy symptoms among residents, unexplained energy bill spikes, weak airflow from certain vents, or temperature inconsistencies between rooms all suggest duct problems demanding immediate attention.
How Can I Maintain My Ductwork Between Inspections?
Change your HVAC filters according to manufacturer recommendations, typically every one to three months depending on filter type and household conditions. Keep all vents and registers clean and unobstructed by furniture or window treatments to maintain proper airflow. Vacuum visible dust from register grilles monthly using your household vacuum's brush attachment. Schedule professional duct cleaning every three to five years, or more frequently if you have pets, allergies, or recent home renovations that created excessive dust.