
TL;DR:
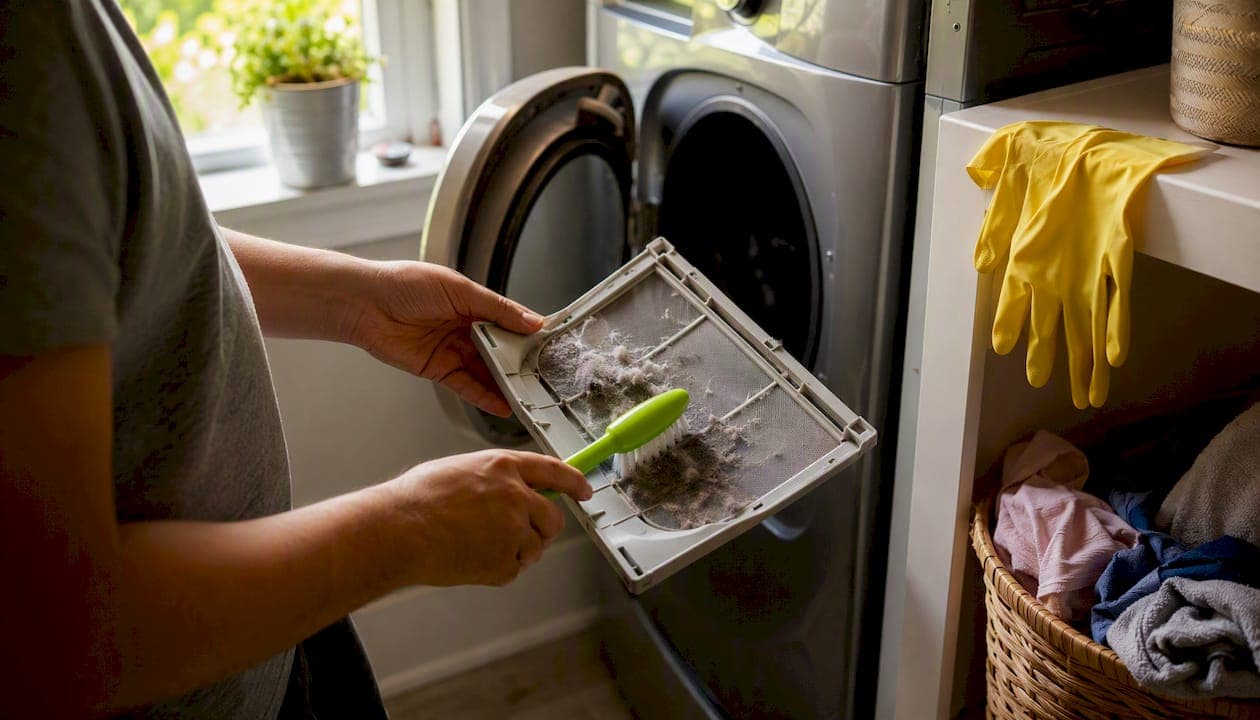
- Homeowners and renters can often safely clean their dryer vents by unplugging the dryer, removing the lint screen, vacuuming the housing, and testing airflow.
- However, complex, long, or damaged ducts require professional cleaning with certified technicians using specialized tools for safety and effectiveness.
Most homeowners and renters can safely clean a dryer vent themselves. Three things determine whether you succeed: unplug the dryer (or shut off the gas), pull the lint screen and vacuum the housing, then run a test cycle and check airflow at the exterior cap when you're done. Skip any one of those and you've either left a fire hazard or have no idea whether the cleaning worked.
The fire risk here is real. Residential dryer vent fires are among the most preventable causes of home fires, and lint build-up in the duct is the primary culprit. INCV-certified technicians at Clean Vents in Laval see this regularly: ducts that haven't been touched in years, packed solid with lint. DIY works well for straightforward runs. For long, vertical, or damaged ducts, a certified professional is the safer call.
Before you start, confirm these three things:
- Power is off (electric) or gas supply is shut off and capped (gas dryer)
- Lint screen is removed and the housing is vacuumed
- You have a way to test airflow at the exterior cap after cleaning
Table of Contents
- What are the signs your dryer vent is clogged?
- What tools and safety steps do you need before cleaning?
- How do you clean a dryer vent step by step?
- Should you clean the vent from inside or outside?
- When should you hire a certified dryer-vent cleaning service?
- Dryer vent maintenance checklist
- Key takeaways
- The case for knowing when to stop DIYing
- Clean Vents: certified dryer vent service in Laval and Quebec
- Useful sources
What are the signs your dryer vent is clogged?
You don't need a diagnostic tool to spot a blocked duct. The dryer tells you. According to Family Handyman, the clearest warning signs are:
- Clothes still damp after a full cycle
- Dryer exterior hot to the touch during or after a run
- A burning or charred smell while the dryer is running
- Lint collecting around the back of the dryer or on the floor
- Longer drying times than usual, even on high heat
On cleaning frequency: clean the lint screen after every single load. For a full deep-clean of the duct, Whirlpool recommends at least once every 12 months. Households with large families, pets, or heavy laundry loads should do it more frequently.
Pro Tip: If your dryer takes more than one cycle to dry a load, that's not a dryer problem. That's almost always a vent problem. Clean the duct before calling an appliance repair technician.
What tools and safety steps do you need before cleaning?
Tools you'll need
- Dryer vent brush kit with flexible extension segments (at least 12 feet total reach)
- Vacuum with a hose attachment, or a shop vac
- Screwdriver (typically Phillips)
- Gloves and a dust mask (N95 preferred)
- Flashlight or headlamp
- UL-listed metal foil tape or worm-drive clamps for reconnecting
Maytag's cleaning guide also lists a leaf blower as an option, but use it cautiously. Blowing air through the duct without extraction can compact lint into elbows rather than clearing it.
Safety checklist
Electric dryers: unplug the power cord completely before moving the unit.
Gas dryers: shut off the gas supply valve behind the dryer and cap the line before disconnecting anything. Never leave a gas connection loose or uncapped.
Moving a dryer alone is awkward and risks kinking the transition duct. A second person helps.
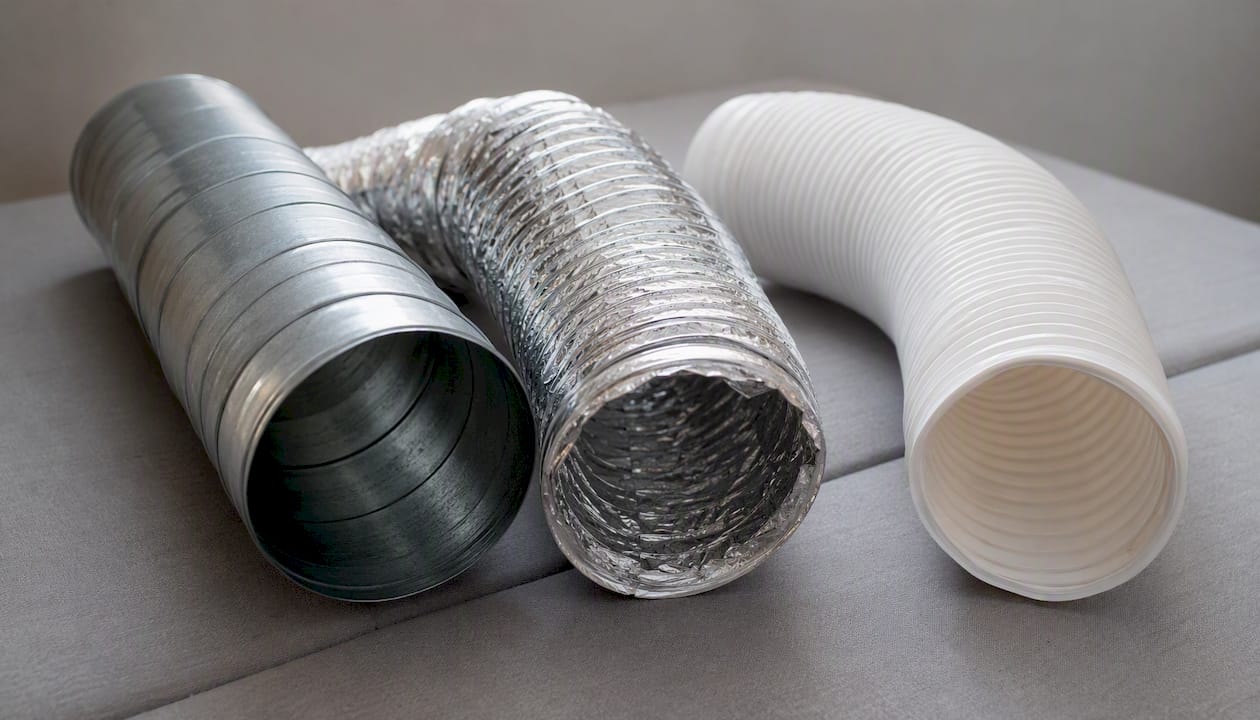
Pro Tip: Rigid or semi-rigid metal ducting is far safer than corrugated foil flex duct. If your dryer uses the white plastic accordion hose, replace it. It's a fire hazard regardless of how clean it is.
How do you clean a dryer vent step by step?
Martha Stewart's cleaning guide and Abt's walkthrough both confirm the same sequence. Here's the full procedure:
- Run a test cycle — Maytag recommends running an empty 15–20 minute cycle, then stepping outside to feel airflow at the exterior cap. Warm, steady airflow means the duct is clear.
Pro Tip: Vacuum from both ends when possible. Brushing from inside pushes debris toward the exterior; vacuuming from outside catches what the brush loosens. The combination beats either method alone.
Should you clean the vent from inside or outside?
Both directions have merit, and doing both is the most thorough approach.
| Direction | Advantage | Limitation |
|---|---|---|
| Inside first | Easy access to transition duct and lint trap housing | Pushes debris toward exterior; needs exterior follow-up |
| Outside first | Gravity assists; debris falls away from the duct | Harder to reach transition section near dryer |
| Both directions | Most thorough; clears the full run | Requires access to exterior cap |
PNNL's Building America Solution Center recommends inspecting the exterior cap as part of every cleaning, not just when you suspect a blockage.
Pro Tip: For stacked washer-dryer units or a dryer venting through a high exterior wall, outside access may be difficult or unsafe. In those cases, clean thoroughly from inside and hire a pro to inspect and clear the exterior cap.
When should you hire a certified dryer-vent cleaning service?
DIY works well for a standard, accessible run. Call a professional when:
- The duct run is long (over 25 feet), vertical, or has multiple elbows
- You've cleaned it yourself and drying times haven't improved
- You found a bird or rodent nest, mould, or significant moisture
- The duct is inaccessible from inside or the exterior cap is out of reach
- You have a gas dryer and aren't comfortable with the gas connection
What a certified pro does
- Inspect the exterior cap and full duct run before touching anything
- Disconnect and isolate the dryer
- Run a rotary brush with HEPA vacuum extraction through the full duct length
- Test airflow with an anemometer before and after cleaning
- Document results, often with before/after airflow readings
What to ask when getting quotes
- Is the technician INCV-certified?
- Is pricing upfront and flat-rate, or estimated on arrival?
- Do they provide an airflow test result and satisfaction guarantee?
- Will they identify and flag damaged duct sections?
Clean Vents in Laval meets all four. INCV-certified technicians, HEPA vacuums, airflow testing, upfront pricing, and a satisfaction guarantee. For homeowners in the greater Laval and Quebec area, it's a straightforward local option.
Pro Tip: Ask for the before/after airflow numbers in writing. A reputable service will have them. If a company can't tell you what the airflow measured before and after, they haven't actually verified the clean worked.
Dryer vent maintenance checklist
| Timeframe | Task |
|---|---|
| Every load | Clean the lint screen; check for unusual smells or heat |
| Monthly | Vacuum lint trap housing; visual check of exterior cap |
| Quarterly | Inspect flex duct for kinks or crushing; clear visible debris at exterior cap |
| Annually | Full duct clean (DIY or professional service) |
| Every 6 months | Full clean for heavy-use households (large families, pets, frequent loads) |
After any full clean, run a 15–20 minute empty cycle and confirm airflow at the exterior cap. That test takes two minutes and confirms the work actually did something.
Key takeaways
Annual dryer duct cleaning prevents lint build-up, reduces fire risk, and keeps drying times normal — DIY works for simple runs, but complex or damaged ducts need a certified pro.
| Point | Details |
|---|---|
| Clean annually at minimum | Deep-clean the full duct at least once a year; every 6 months for heavy-use households. |
| Safety first, always | Unplug electric dryers or shut off gas before disconnecting anything. |
| Test airflow after cleaning | Run a 15–20 minute empty cycle and feel for warm, steady airflow at the exterior cap. |
| Replace unsafe duct materials | Corrugated plastic or foil flex duct should be replaced with rigid or semi-rigid metal. |
| Clean Vents for complex runs | INCV-certified service in Laval with upfront pricing, HEPA vacuums, and a satisfaction guarantee. |
The case for knowing when to stop DIYing
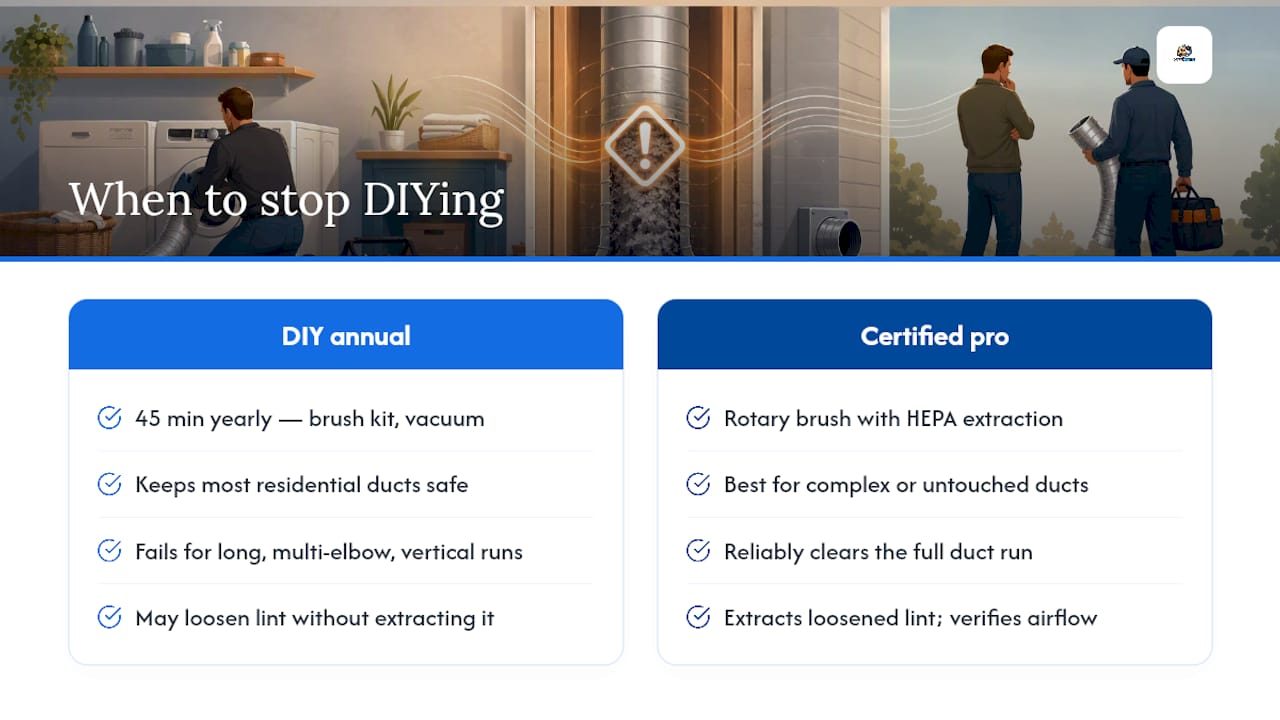
The DIY approach to dryer vent maintenance is genuinely worth doing. A brush kit, a vacuum, and 45 minutes once a year keeps most residential ducts clear and safe. The problem isn't the task; it's the tendency to assume a clean lint trap means a clean duct. Lint bypasses the screen on every load and accumulates in the duct over time, regardless of how diligently you clean the trap. That's the gap most homeowners miss.
Where DIY falls short is on complex runs: long horizontal ducts with multiple elbows, vertical runs through two storeys, or any duct that hasn't been touched in several years. A brush kit can loosen lint in those situations without extracting it, which sometimes makes things worse. The rotary brush plus HEPA extraction method that certified technicians use isn't overkill for those cases; it's the only approach that reliably clears the full run and verifies the result with measured airflow.
The honest position: do the annual DIY clean yourself. If drying times don't improve, or if you find anything unexpected during the process, stop and call someone who can measure the result.
Clean Vents: certified dryer vent service in Laval and Quebec
Cleaning a dryer vent yourself is the right call for a straightforward duct. When the run is long, the duct is damaged, or you'd simply rather have it done properly the first time, Clean Vents handles it with INCV-certified technicians, HEPA vacuum extraction, and airflow testing before and after the job.

Upfront flat-rate pricing means no surprises on the invoice, and every job comes with a satisfaction guarantee. Clean Vents serves homeowners and renters across Laval and the greater Quebec area. If you're also dealing with dusty air ducts or a wall-mounted AC unit that hasn't been serviced in years, those can be bundled into the same visit.
Book your dryer vent cleaning online for a free quote, or visit cleanvents.ca to book by phone. The air duct cleaning service page covers combined service options if you want a full indoor air quality check at the same time.
Useful sources
- Clean a Dryer Vent | Family Handyman
- Clean dryer exhaust | Building America Solution Center (PNNL / BASC)
- How to Clean Your Dryer Vent for Safety and Efficiency | Martha Stewart
- How to Clean a Dryer Vent | Maytag
- How to clean a dryer vent | Abt
- How to clean a dryer | Whirlpool
- Dryer vent cleaning services guide | LintSnap
- Dryer vent cleaning | Long Island Air Duct Co.